
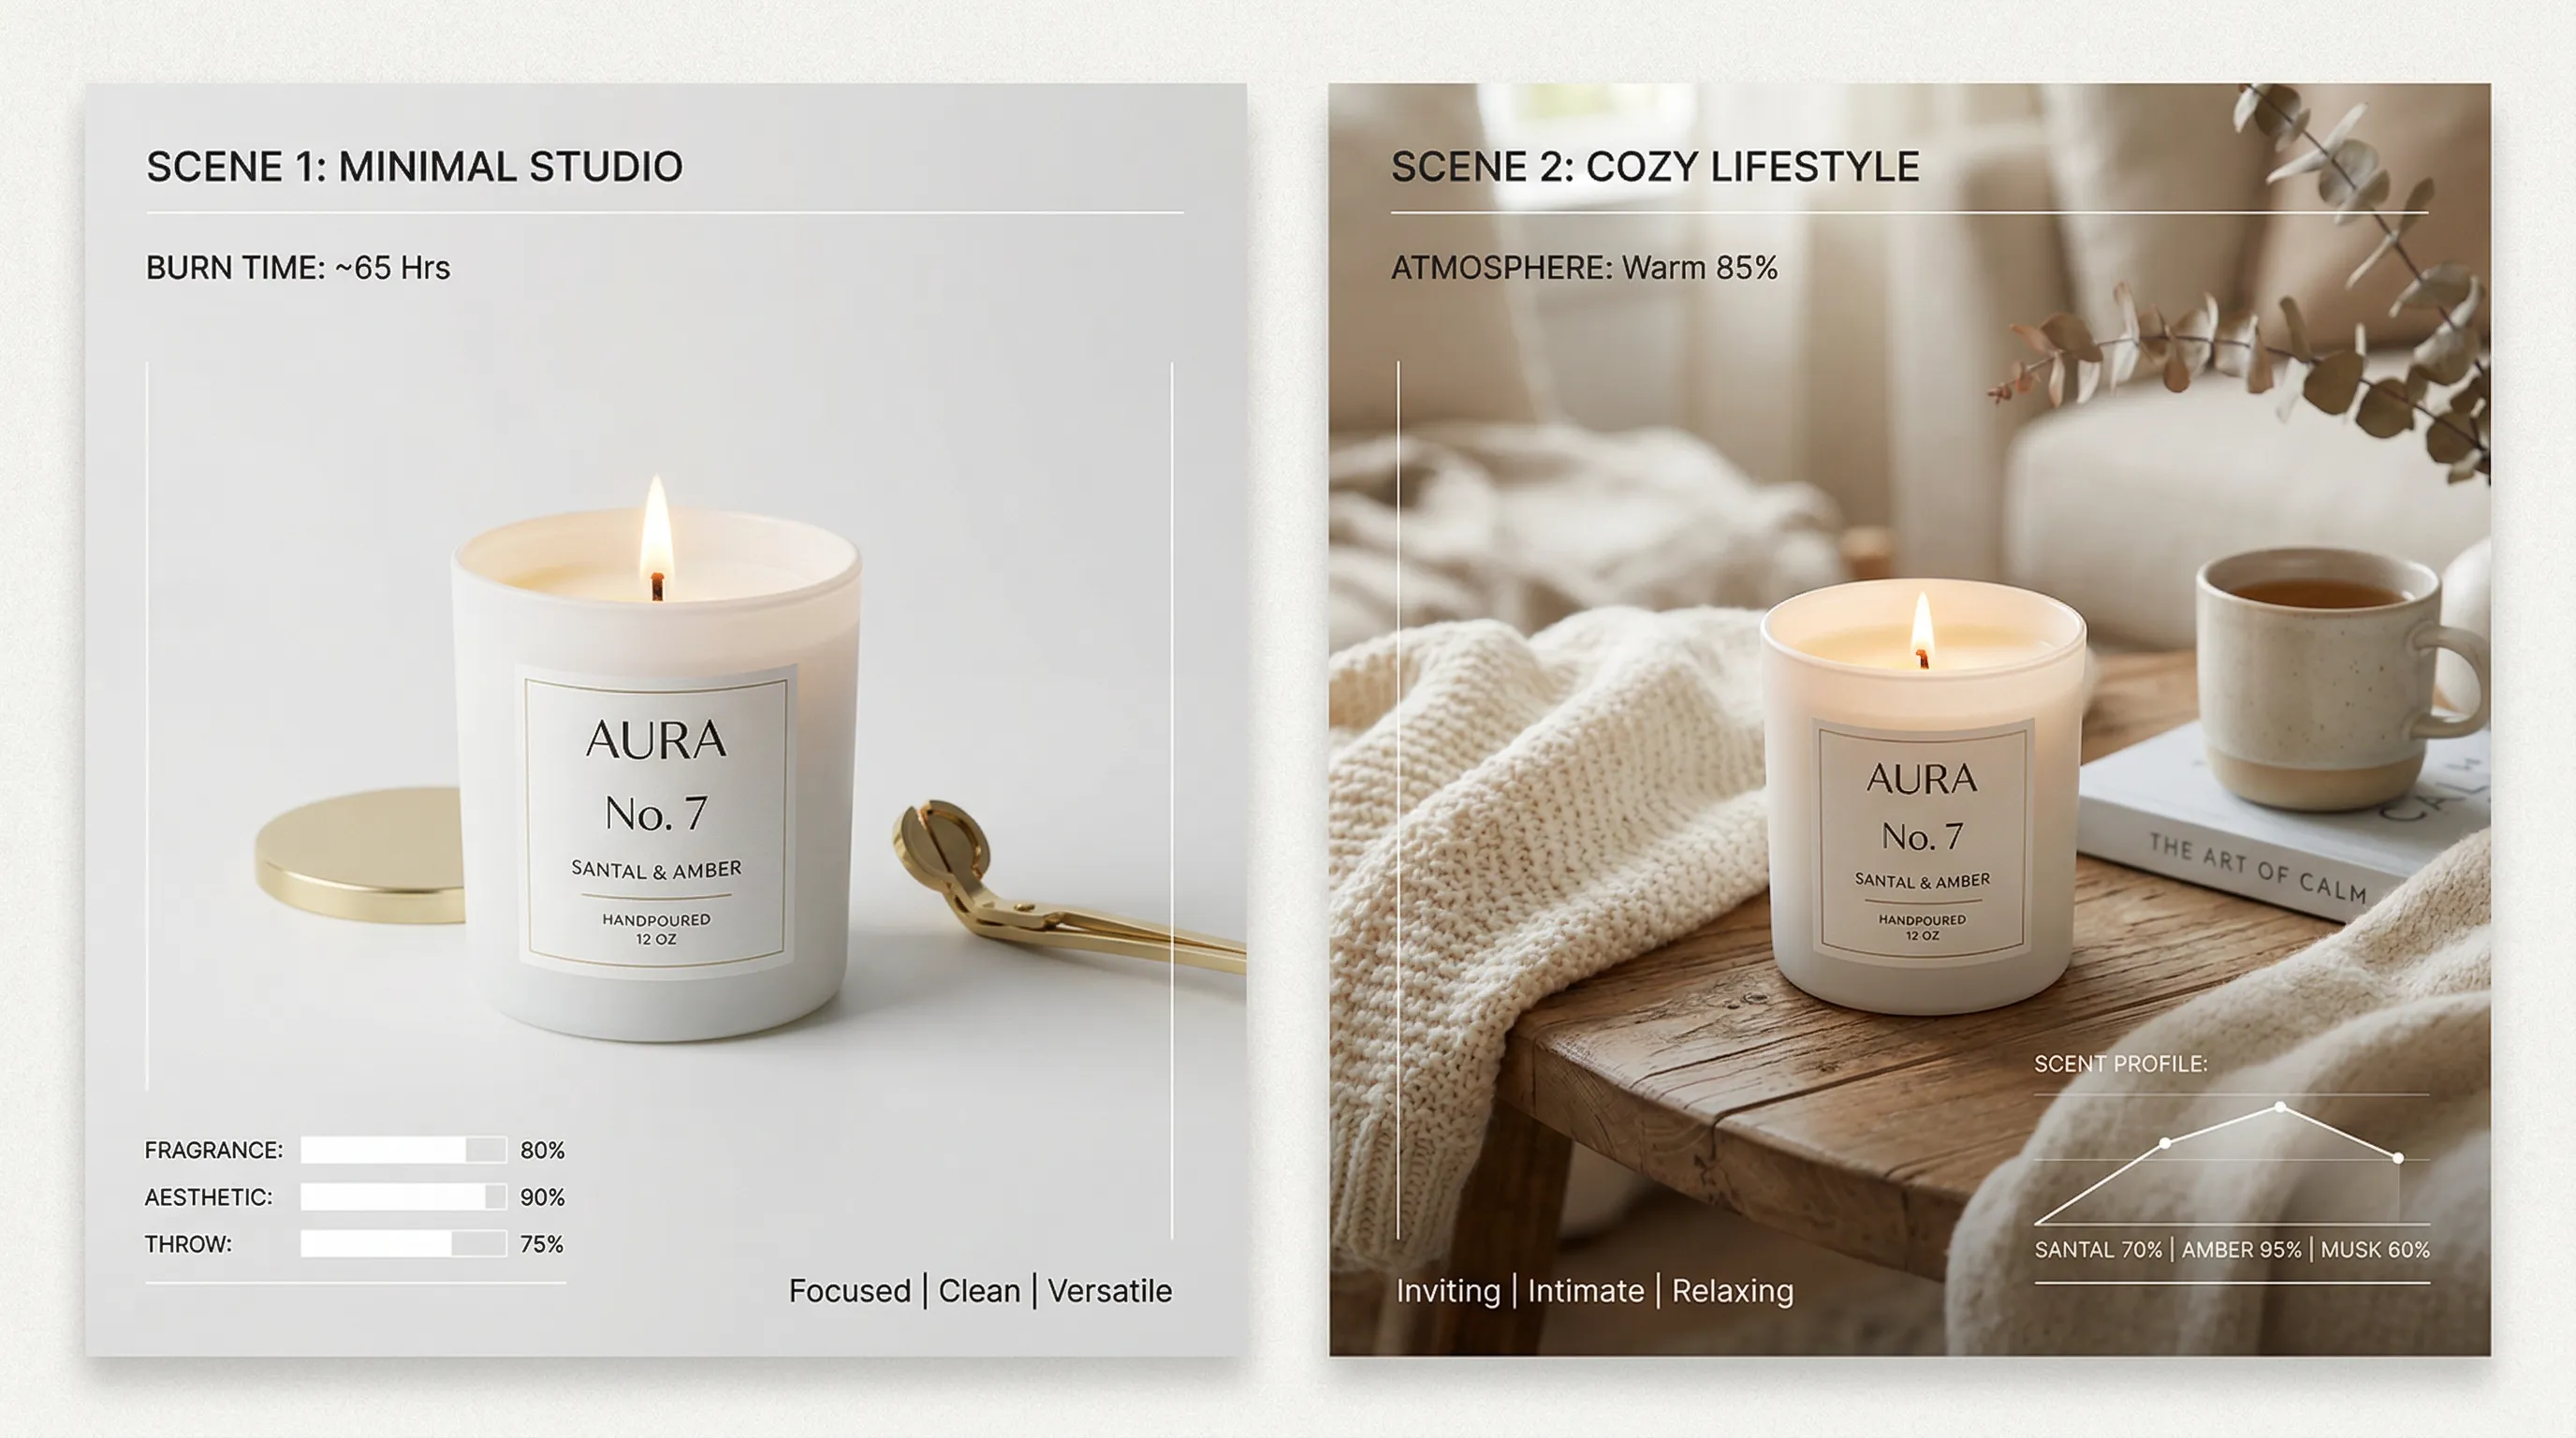
Your Product Images Are the First Thing Shoppers See. Are You Testing Them?
This article covers a prioritized framework for how to A/B test product images, the methodology to run clean tests, sample-size planning, and what published evidence can and cannot tell you about winning variants. The lessons here come from that evidence and experiment design. AI variant generation from tools like Nightjar has changed the economics of testing, and we will get into exactly how.
Here is the short version: choose a real buyer uncertainty, create truthful alternatives, randomize who sees them, and decide in advance what evidence would justify a change.
In Baymard's product-page usability study, 56% of participants' first actions involved exploring the images. That makes imagery worth investigating; it does not establish that it outweighs every other page element or that a particular photo treatment will win.
Why Product Image Tests Can Be Hard to Run
The Cost Barrier
Producing alternatives can consume the testing budget before the experiment starts. Consider three background variants across 50 products: 150 images. At an illustrative quote of $100 per finished image, that is $15,000. This is a budgeting scenario, not a market-average rate; compositing existing captures or changing a set during one shoot may cost differently.
Include source preparation, retouching and logistics in the cost per SKU.
The Variable Isolation Problem
A second photo session can change lighting, camera position or styling along with the background.
A valid randomized A/B test can compare two complete image treatments. What it cannot do is prove that the background alone caused a difference if the product scale, angle and lighting also changed. For an isolated-background question, keep the product, Framing, and lighting direction the same across variants, for example by reusing one saved Nightjar setup and changing only the Background, then inspect the actual files for any other differences.
| Approach | Example production budget for 150 outputs | Isolation check |
|---|---|---|
| Physical photography/compositing | A $100-per-approved-image quote would total $15,000, plus exclusions | Same-session capture or controlled editing can hold other elements steady |
| Nightjar | 150 Credits for 150 completed Single Image outputs at 1K/2K; 300 at 4K | Reuse direction, then compare outputs |
For a detailed cost comparison between AI and traditional photography, we have written a separate breakdown.
What to Test First: A Prioritized Image Testing Hierarchy
Use the following as a starting order when the existing photos already meet accuracy and quality basics. It is a practical hypothesis list, not an empirical ranking of expected lifts. Move an item up when customer questions or behavior point to it; repair unreadable or misleading images before testing aesthetics.
| Starting priority | Variable | Buyer question to investigate |
|---|---|---|
| 1 | Background and context | Does seeing the use case help someone understand the item? |
| 2 | Hero image selection | Which lead view identifies the product and its main benefit clearly? |
| 3 | Composition and angle | Is a feature or dimension hidden in the current view? |
| 4 | Image count and sequence | Which useful evidence is missing or buried? |
| 5 | Styling and props | Does context clarify the product or distract from it? |
| 6 | Technical presentation | Once defects are fixed, does a different crop or zoom experience help inspection? |
Priority 1: Background and Context
Background is a useful candidate when the current image leaves the use case unclear. A kitchen counter and a clean studio answer different questions; neither is universally stronger. Our lifestyle versus packshot analysis explores that distinction.
Generate or photograph alternatives, then decide what the test really compares. If a lifestyle treatment changes the light, props and angle too, label it a whole-treatment test. If you need a background-only result, preserve the product layer and other visual variables deliberately.
For more on how this works in practice, see our guide to AI product placement in scenes.
Priority 2: Hero Image Selection
The lead image is a sensible place to test because shoppers encounter it before exploring the rest of the gallery.
Baymard's scale-image research shows why familiar size context matters. For a bag, a full product view may identify the design while an in-use view explains capacity. Test which belongs first for that placement, within its image rules.
Priority 3: Composition and Angle
Different angles communicate different things. A front view shows overall design. A side view communicates depth and build quality. A top-down shot works well for flat-lay products.
Keep angle hypotheses tied to visible information: a side view might reveal a port or heel height that a front view hides. Do not forecast a lift from an unrelated model-styling anecdote. The widely repeated AdonisClothing beard story is explicitly labeled an April Fool's fiction by VWO, not experimental evidence.
If you want to test multiple angles from a single product photo, our AI camera angle control guide covers the workflow.
Priorities 4-6: Image Count, Styling, and Technical Quality
Do not assume these changes are smaller. A missing detail view or broken mobile zoom can be more important than a new background.
- Test adding a specific missing view, not image count for its own sake.
- Test the sequence that answers the next likely question.
- Check whether props obscure scale or imply unbundled accessories are included.
- Fix blur and illegible product text before running a preference test.
Hush Blankets' VWO case is a useful layout example: moving thumbnails to the left of the main image was reported to increase checkout-page visits by 5.67% and checkout rate by 33.1%. It was not a test showing a universal image-count or background lift.
How to Run a Product Image A/B Test (Step by Step)
Step 1: Form a Hypothesis
State what you are testing and what you expect. Be specific. "A kitchen-use image will increase add-to-cart rate by at least 10% relative to our current packshot" is a hypothesis. "Let's see which image looks better" is not.
Choose one primary outcome and state whether the target is relative or percentage-point change. Hold price, copy, promotions and the rest of the page stable. If you change background and angle together, you can test the image package, but cannot attribute the result to either component alone.
Step 2: Generate Your Variants
With Nightjar, save the Product's real photos and facts, then choose a Photography Style and Background, with Framing for a product-only shot or Pose and Camera Distance for on-model work. Produce the control and alternatives with a documented brief. Reuse the same selected direction where it should stay constant.
Check each variant before it enters the test. When variants differ in more than the tested element, either correct those differences or record that you are testing the whole visual treatment.
For a repeated setup, save the Create-form direction and output settings as a Recipe, then apply it to the next Product. That makes Nightjar useful for a recurring test-asset workflow.
At 100 products and three outputs each, 300 completed Single Image outputs use 300 Credits at 1K/2K or 600 at 4K. Convert it to dollars using the applicable Nightjar plan, not a universal ten-cent rate.
For related workflows, see best white background product photography apps.
Step 3: Choose Your Testing Tool
The right tool depends on where you sell.
| Platform | Tool or approach | What to verify |
|---|---|---|
| Amazon | Manage Your Experiments | Professional account, Brand Representative role for an enrolled brand, eligible ASIN traffic and compliant image variants |
| Shopify | Shoplift or Intelligems | Image/template support, visitor allowance, current price and testing method |
| DTC / custom | VWO or a suitable experimentation platform | Persistent visitor assignment, exposure logging, metrics and the stopping rule |
| Pre-launch / low traffic | PickFu or moderated customer research | Audience relevance and a useful question; this is preference feedback, not live conversion data |
A note on PickFu: it measures stated preference, not purchase behavior. Useful for narrowing down variants before committing to a live test, but do not treat poll results as conversion data.
For Amazon sellers specifically, we cover the image requirements and constraints in our Amazon product photography guide.
Step 4: Set Sample Size and Duration
Calculate sample size from the baseline rate, minimum detectable effect, significance threshold, statistical power and number of variants. There is no universal "200 conversions is enough" rule for image tests.
For scale, a fixed-horizon two-arm test starting at 3% conversion and looking for a 10% relative improvement to 3.3% needs roughly 52,000 visitors per arm using Evan Miller's planning approximation, at conventional 5% significance and 80% power. Detecting a smaller effect takes substantially more traffic. Use the calculator and statistical method appropriate to your platform; Optimizely's calculator explicitly asks for baseline, minimum detectable effect and significance.
Allow complete business cycles as well as enough sample. Two weeks can cover weekdays and weekends, but is not sufficient by itself. Amazon recommends 8–10 weeks for a custom duration and says its to-significance mode can sometimes finish in four.
If the traffic cannot support the effect worth detecting in a reasonable period, test fewer variants on high-traffic pages or use qualitative feedback to improve obvious comprehension problems. Do not pool unrelated SKUs and call the combined answer a win for every product.
Randomize eligible visitors concurrently and keep each visitor in the same group. Confirm exposure and purchase tracking on desktop and mobile before launch; check that the traffic split is plausible. A before/after image swap is vulnerable to seasonality and acquisition changes.
Step 5: Do Not Peek
For a fixed-horizon test, do not stop the first time the result looks significant. Evan Miller explains how repeated significance checks followed by early stopping inflate false positives.
Operational checks for broken tracking or harmful behavior are still appropriate. If the testing platform uses a validated sequential method, follow that method's stopping rules instead of applying fixed-horizon rules blindly. Predefine the primary metric and how multiple variants will be handled; report the effect estimate and uncertainty, including inconclusive results.
What We Have Learned About Product Image Testing
These are lessons from the published sources above and below.
Published Results Need Their Original Context
Photoroom's Label Emmaüs case study reports fashion conversion up 56% and home conversion up 34% after integrating its Remove Background API. This was a seller-image standardization project on a secondhand marketplace, not a documented background-only randomized test of generated lifestyle photos. It supports investigating inconsistent imagery, not budgeting a 56% lift for another store.
The Hush example concerns gallery layout. The Adonis story is fiction. Reading the original source prevents very different claims from becoming one misleading "backgrounds win" rule.
Lifestyle Does Not Always Win
A lifestyle scene can explain use; a plain detail view can explain construction. Choose the candidate based on the missing information and the placement. An ad, collection tile and PDP can need different lead images. The right answer depends on the product, audience and task, which is the reason to test.
For more on the ROI comparison between lifestyle and white-background approaches, see the detailed analysis.
Inspect Isolation, Do Not Assume It
A saved Nightjar Recipe keeps the requested direction reusable. Traditional capture can also be controlled with a fixed set or composite. Judge isolation from the files the visitors actually see.
A whole-image test remains useful if that is the decision you intend to make. Just do not tell the team "marble won" when the winning image also changed the crop and product size.
The Compounding Math of Small Lifts
A 5% conversion lift sounds modest in isolation. Run the numbers across a catalog and the picture changes.
Take a mid-size store: 50 products, 1,000 monthly visitors each, $50 average order value, 3% baseline conversion rate. That is $75,000 per month in revenue. A measured 5% relative lift, from 3% to 3.15%, would bring it to $78,750 per month if traffic and average order value stayed constant. Sustained for a year, that would be $45,000 in additional revenue, not profit.
Five sequential tests with three variants across those 50 products would require 750 outputs if each test needs a fresh full set. At 1K/2K Single Image, that is 750 Credits. Add testing software, production and review labor, then compare total cost with incremental contribution margin, not just the revenue opportunity.
The useful question is whether the measured gain survives those costs and the uncertainty around the estimate.
Platform-Specific Testing Notes
Amazon
Test compliant main-image alternatives as well as other eligible image content; Manage Your Experiments is not limited to secondary images. Follow Amazon's product-photo guidance and category rules: actual-product representation, pure-white main backgrounds where required, appropriate frame coverage and no added overlays. Its public guide lists 500–10,000 pixels on the longest side, with a separate preference for images above 1,000 pixels per side for zoom.
Manage Your Experiments requires an eligible account, role and sufficiently trafficked product. Check its preselected duration and automatic-publication settings before starting. A vendor's broad optimized-content uplift is not an expected image-test result.
Shopify
Your own Shopify store usually allows more visual flexibility, but the theme and any connected sales channel still matter. Use a tool that can assign and measure the correct image treatment. Confirm collection thumbnails, product galleries and mobile views change only where intended; test the gallery experience as well as the asset.
Ads (Meta, Google Shopping)
Ad thumbnails follow different rules than product pages. Test them separately.
What works on a product page may not work in a feed. Run distinct tests for each placement with a clearly defined outcome: an ad click is not the same as a purchase, and cheaper clicks need not produce lower acquisition cost. Keep audience, bids and attribution settings comparable.
Frequently Asked Questions
What should I test first? Fix inaccurate or unreadable images, then test the biggest unresolved buyer question. Background/context and hero selection are useful starting candidates, not guaranteed highest-lift categories. Change one visual element when you need to attribute its effect; otherwise call it a whole-treatment test.
How long should I run an image A/B test? Until the preplanned sample and business-cycle requirements are met, or your platform's valid sequential stopping rule is satisfied. Two weeks alone is not proof. Amazon's guidance recommends 8–10 weeks for custom-duration experiments; to-significance can sometimes finish earlier.
Do lifestyle images convert better? Sometimes, but another store's result is not your forecast. A lifestyle view explains use; a clean studio or detail view may better answer a different question. Test within the placement's rules.
Which Shopify tools can I use? Shoplift and Intelligems support content experiments; check their current image/template features and pricing for your traffic. PickFu and customer interviews can help narrow alternatives, but measure stated feedback rather than live purchasing behavior.
How many visitors do I need? Use your baseline, minimum detectable effect, power, significance threshold and test design. In the illustrative 3% to 3.3% fixed-horizon example, roughly 52,000 visitors per arm are needed. A blanket target of 200–300 conversions is not enough to promise sensitivity to a small lift.
How much do test variants cost? Nightjar Single Image uses one Credit per completed 1K/2K output or two at 4K. Add testing software and review time, then compare that total with a quote for the same physical or composited deliverables.
Can I use AI-generated images in Amazon tests? A test does not waive listing rules. Review the exact image, actual-product representation and category requirements. Selecting white, 2K and 1:1 in Nightjar controls those requested settings.
References
- Baymard, In-Scale Product Images: observed image use and scale uncertainty
- VWO, Product Page Testing Ideas: Hush gallery-layout results and their metrics
- VWO, AdonisClothing fictional story: explicitly disclaimed April Fool's article, not empirical evidence
- Photoroom, Label Emmaüs: vendor-reported marketplace standardization results
- Evan Miller, How Not to Run an A/B Test: sample planning and repeated-testing errors
- Optimizely sample-size calculator: baseline and effect-size inputs
- Amazon Manage Your Experiments: eligibility, randomization and duration
- Amazon product-photo guidance: image requirements