How can I visualize my furniture or home decor products in a real room using AI?
3 min read
How can I visualize my furniture or home decor products in a real room using AI?
Quick Answer
Use Nightjar and its Product Placement Edit Shortcut, a one-click setup in the Edit tab that drops a product into a scene. Upload a photo of the furniture or decor item, upload a photo of the room, and Nightjar matches perspective, lighting, and shadows so the product looks placed in the room, not pasted on top of it.
Why Context Sells Home Decor
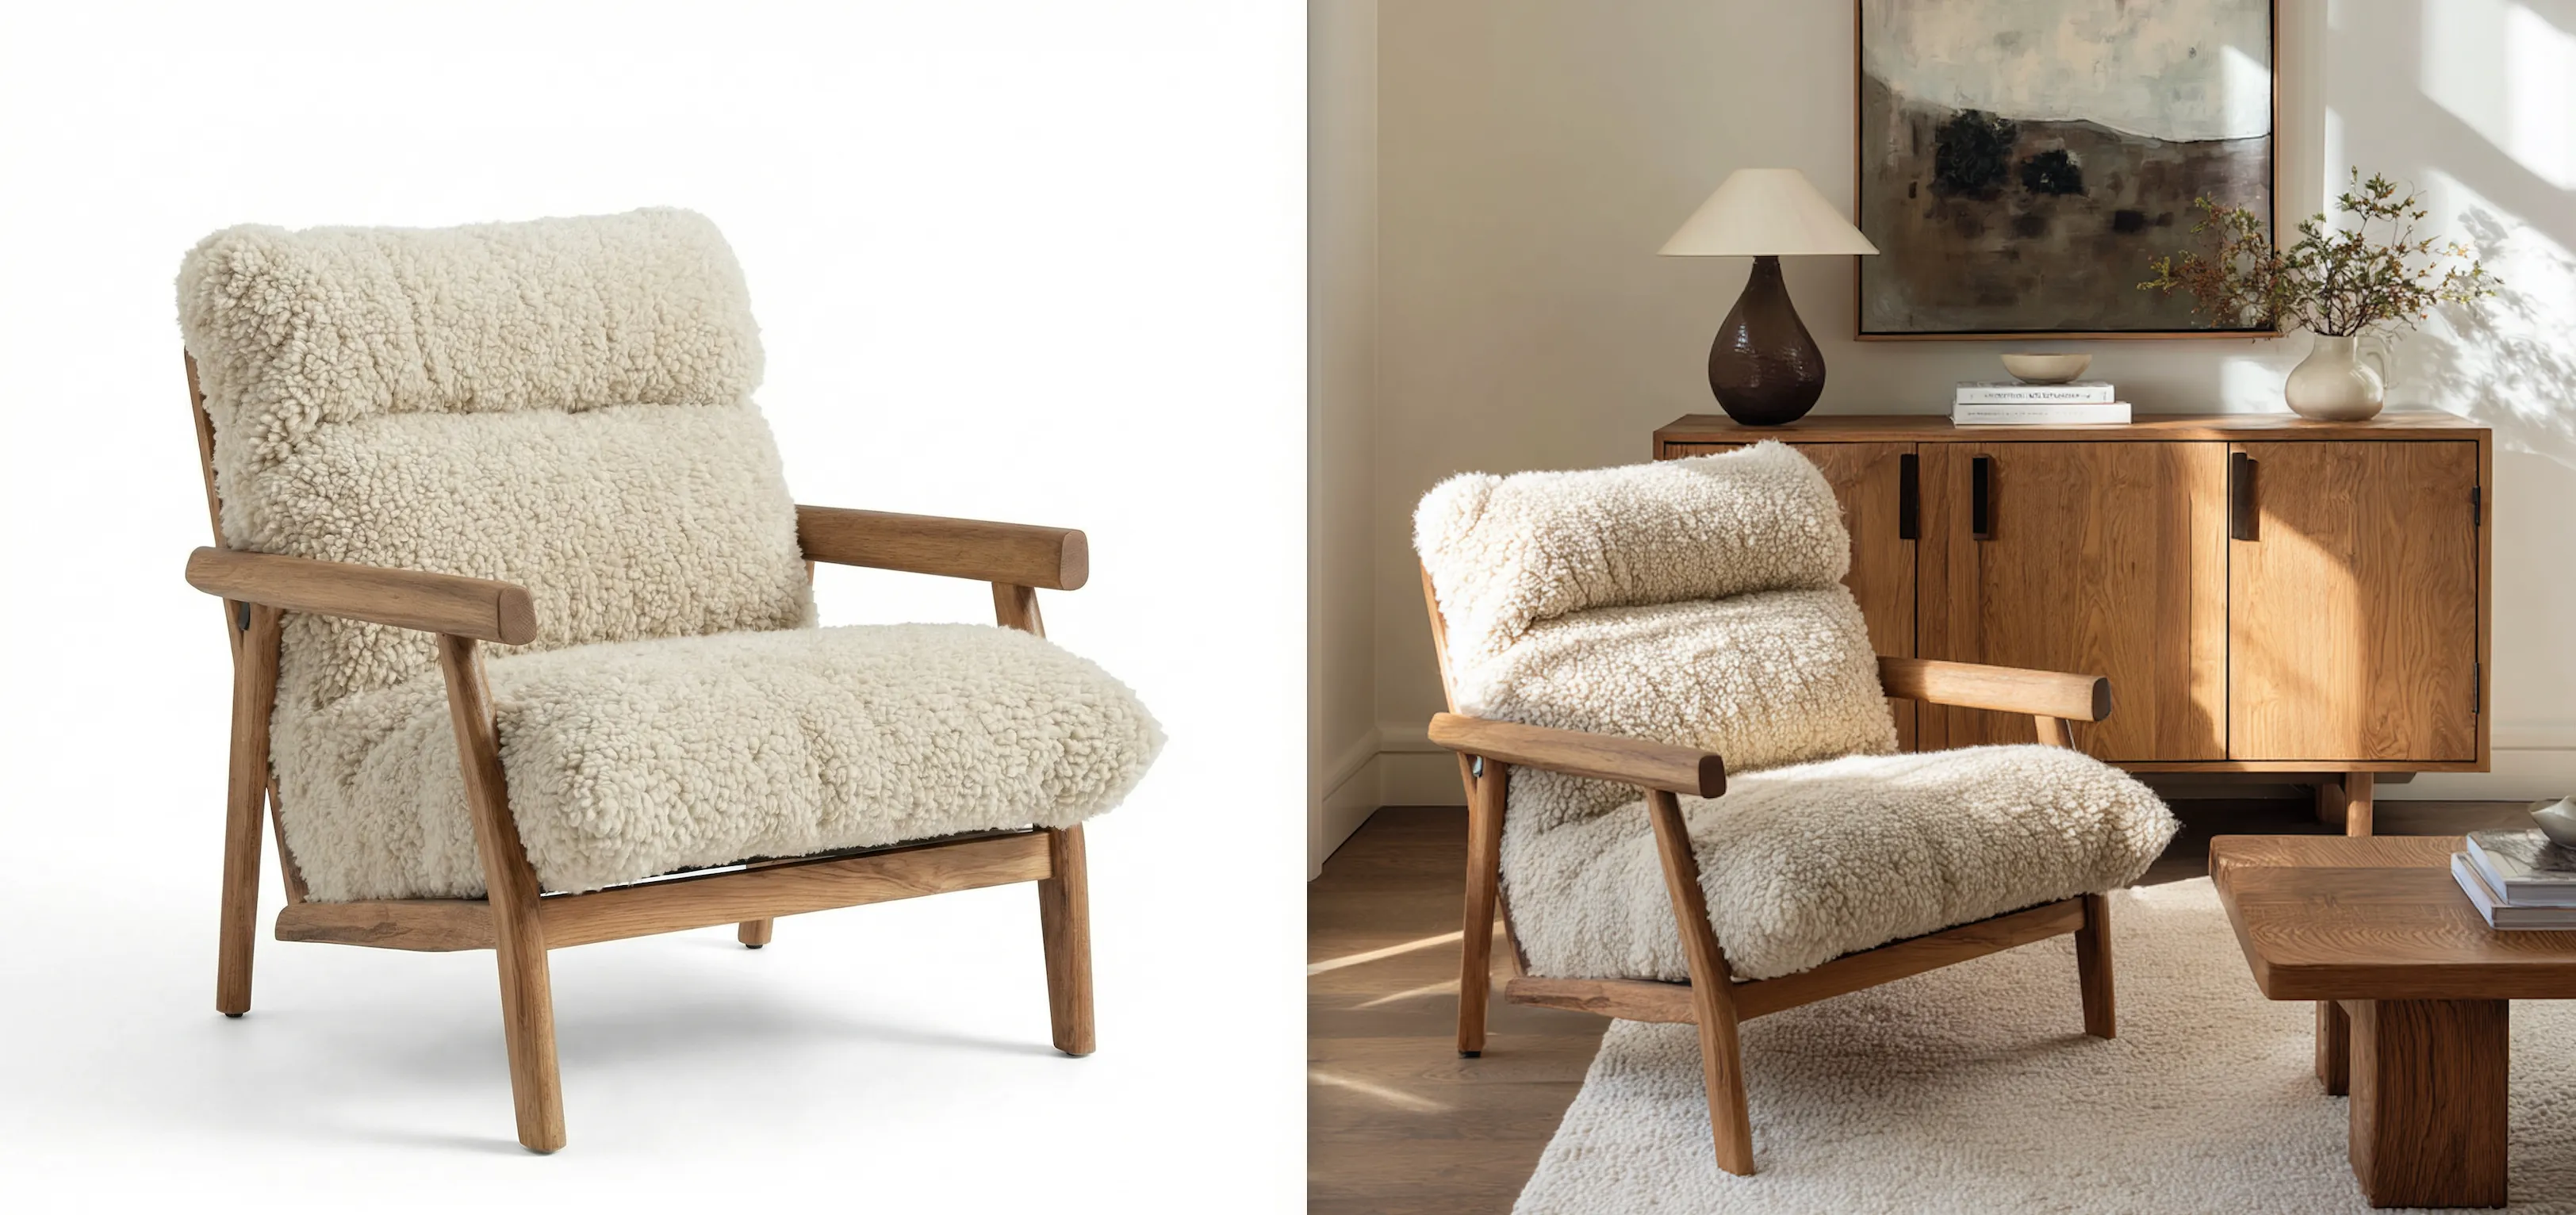
Customers hesitate to buy furniture online because scale and fit are hard to judge from a white-background image. "Will this fit?" "Does it match my couch?"
A room scene answers both questions in one frame. Studio staging for furniture is slow and expensive; an AI-generated room scene gets you the same context from a single product photo.
How to Place a Product into a Room in Nightjar
The fastest path is the Edit tab. Nightjar groups common edits behind named one-click setups it calls Edit Shortcuts; the Product Placement shortcut is the canonical path for combining a product image with a scene image.
1. Add the product image to the board The Edit tab uses a multi-image board where every image you bring in becomes an Asset (Nightjar's word for any stored image in your Library, the Team-shared collection of uploads and Generations). Upload the furniture or decor photo, or pick it from a previous Generation.
2. Add the scene image to the board Upload a photo of the room where you want the product placed.
- An empty room photo works well.
- A stock photo of a styled room works too.
- Tip: a room with window light tends to give the most natural result, because Nightjar has more lighting cues to match.
3. Pick the Product Placement Edit Shortcut
Open the Edit tab and pick Product Placement. Nightjar pre-fills a prompt that references both images via @image1 and @image2 pills, so the model knows which image is the product and which is the scene.
4. Refine the instruction (optional) Edit the pre-filled prompt to be specific about where the product should go:
- "place the lamp from
@image1on the desk in@image2" - "place the rug from
@image1under the coffee table in@image2"
This kind of free-text refinement on top of a structured shortcut is what Nightjar calls Custom Directions.
5. Set output controls Use the inline commands or the form:
/ratiofor aspect ratio (1:1 for catalog grids, 4:5 for Instagram, 16:9 for hero banners)./formatfor output format (JPEG, PNG, or WebP).
6. Generate Submit. Nightjar reads the room's lighting, places the product with matching shadows and perspective, and aligns color and material so the result is designed to look like a real photograph rather than a composite.
Turning One Good Room Shot into a Set
Once a placement looks right, you usually want more than one image of it: a wide shot, a closer detail, a different angle. Run the resulting image through Photoshoot, a Nightjar Workflow that takes one Asset and expands it into four cohesive variants that share the same room, lighting, and styling. It is a faster way to fill out a product detail page or a small lifestyle gallery without re-running the placement four times.
Consistent and on brand AI photoshoots, optimized for conversion.
Nightjar